
What Day One Usually Looks Like in the Training Bay
Most beginners think the first day will be all sparks and welding runs. In practice, the first part of the day is usually slower and more useful than that. You will be shown the training bay, the handheld laser welding unit, the work area, the shielded enclosure if one is used, and the controls you need to know before anything is switched on.
The instructor will normally explain how the beam behaves, how the workpiece should be positioned, and why clean preparation matters so much. With laser welding, small changes in angle, gap, and travel speed make a big difference. That is why the first day is often about understanding the process before trying to move too fast.
At a Boksburg training base, learners often come in after a long commute from the East Rand or Johannesburg and are eager to weld immediately. The best thing to do is slow down, listen carefully, and keep notes. You are not expected to know everything. You are expected to learn the routine safely and repeat it properly.
Safety Comes First Before Any Welding Starts
Handheld laser welding is precise, but it is still a high-energy process and safety must be taken seriously from the first minute. You will usually be briefed on the laser class being used, why eye protection is compulsory, and how to keep bystanders away from the work area. Even brief exposure to direct or reflected laser light can be harmful, so proper habits matter from day one.
Fume extraction is another early lesson. When metals are heated, fumes and fine particles can rise quickly, and that is especially important in enclosed workshops or during long sessions. A proper extraction setup helps keep the air cleaner and makes the working area more comfortable. If you are training in Durban or Cape Town, coastal humidity can also affect comfort and storage, so a tidy dry setup helps more than many beginners expect.
You will likely cover a few core rules before any practical work begins:
- Wear the correct eye protection for the equipment in use.
- Keep the lens area clean and inspect cables and connectors before starting.
- Use the extraction system from the start, not only when smoke becomes visible.
- Keep flammable materials, solvents and loose rags away from the bay.
- Follow the instructor’s instructions exactly when changing settings or handling the torch.
These steps sound basic, but they prevent most first day mistakes and help learners build safe habits early.
What You Will Learn Before You Touch the Trigger
Before the first weld, you will normally learn the parts of the machine and what each control does. That includes power settings, shielding gas flow if it applies to the unit, wire feed where relevant, and how the handheld head is guided across the joint. The goal is not to memorise every button on day one. The goal is to know what changes the weld and why.
Expect a short explanation of material preparation too. Clean edges, the right fit-up and a stable work surface matter a lot. Rust, oil, paint and heavy scale can interfere with the weld and create poor results. In practical training, this is where many beginners realise that good welding starts before the torch is even picked up.
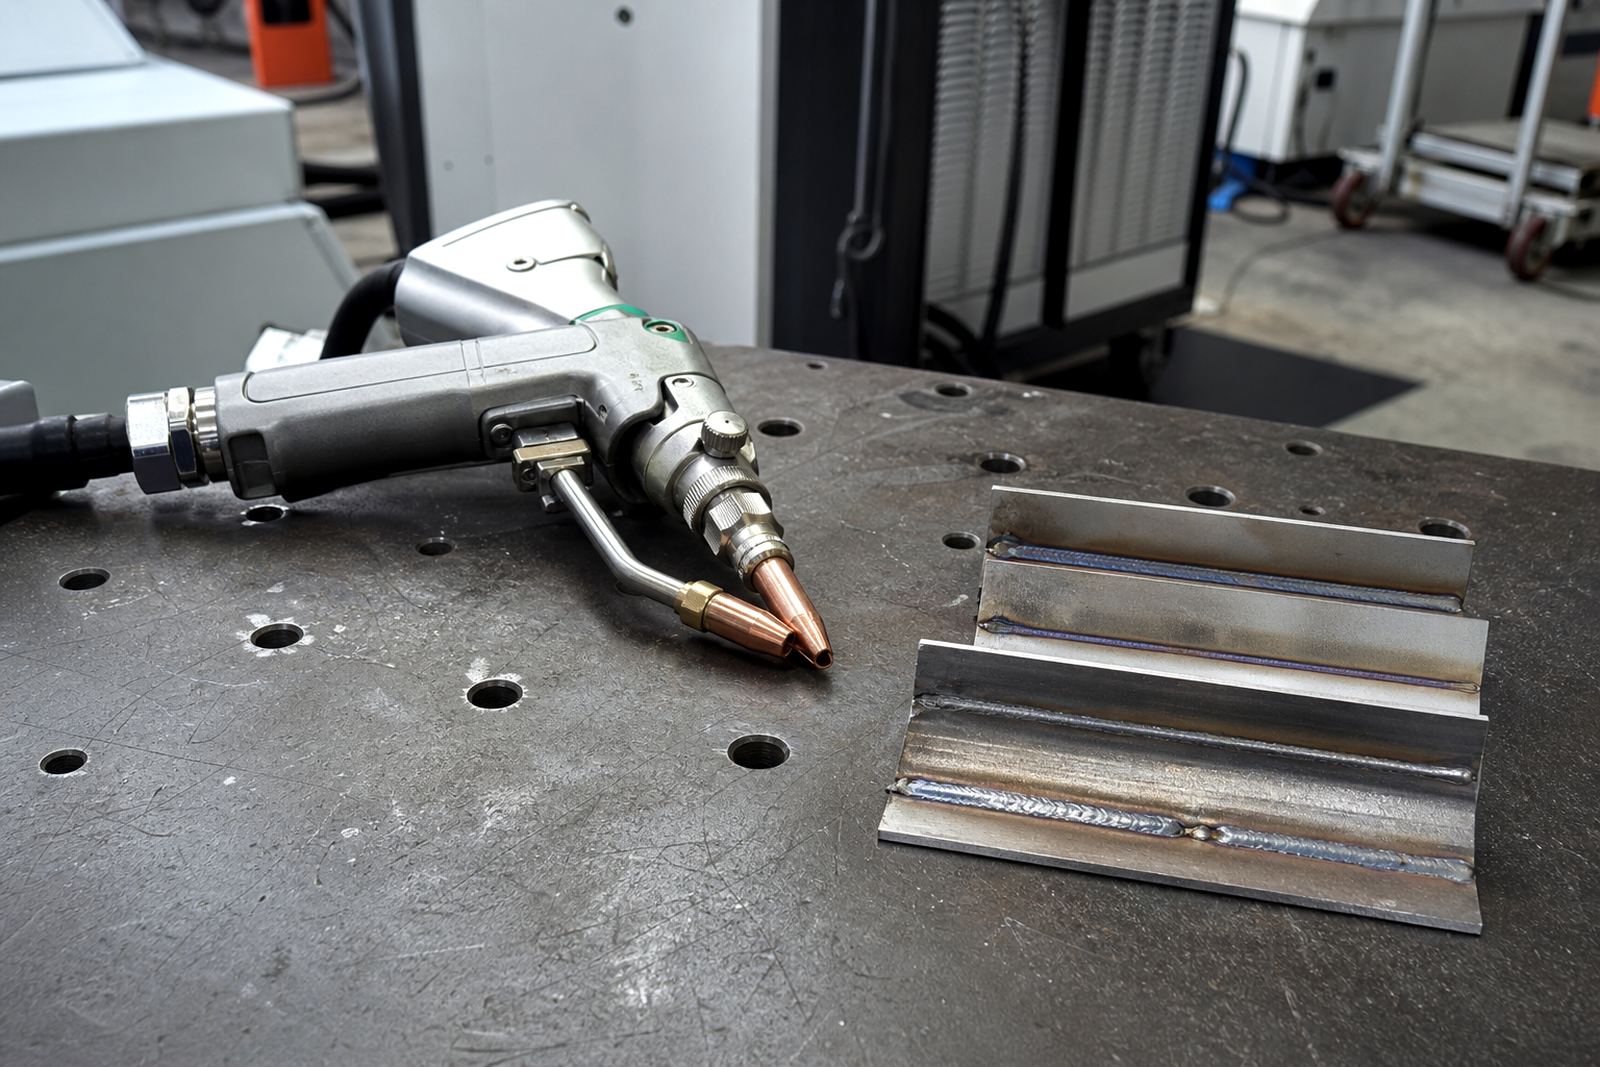
You may also be shown sample joints and finished test pieces so you can compare poor and correct results. That visual comparison helps a lot, because it makes it easier to recognise undercut, uneven bead shape and heat input issues later in the day.
Bring the Right Mindset and a Few Practical Items
For your first day, comfort and preparation matter. Wear clothing that covers your arms and legs, and choose closed shoes with good grip. Avoid loose sleeves, synthetic fabrics that can melt easily, or anything that might catch on the work area. A cap or head cover can also help keep your hair controlled under PPE.
It is also wise to bring a notebook, a pen and a clear head. Handheld laser welding involves a lot of small adjustments, and most learners benefit from writing down the settings and notes given during the exercises. If the class covers a training document pack, keep it organised from the start so that you can refer back to it later.
Useful items for day one include:
- Closed leather or safety shoes with steady footing
- Long trousers and a long-sleeve top
- Notebook and pen for settings and reminders
- Any required personal protective equipment listed by the trainer
- Water and a light snack if the session runs for several hours
In Gauteng, especially during load shedding periods, training schedules can sometimes be adjusted around power availability. It helps to arrive on time and ready to start so the practical session can make the most of the available window.
How the First Practice Runs Usually Feel
Your first practice welds will probably feel awkward and that is normal. Most beginners watch the joint too closely, move too fast or pause too long at the wrong moment. The instructor will usually stand close, correct your hand position, and help you keep the torch steady over the seam. Small corrections make a big difference, and they are easier to learn early than later.
On day one, you may begin on scrap material or simple flat joints before moving to more detailed work. That gives you room to make mistakes without pressure. If you are in a class with other learners, you will also learn by watching how different people handle the same task. Some learners are very steady but slow, while others are quick and need to control heat better.
The main thing is not to chase speed. Good first-day work is usually neat, controlled and repeatable rather than fast. That is how confidence grows.
Starter Kits and Why They Help After the First Lesson
If you plan to continue practising after training, a starter kit can be very useful. A sensible kit usually includes the basic consumables, protective items, cleaning tools and small accessories needed to set up a beginner practice area. It should help you keep the equipment ready for repeat use, not overwhelm you with parts you do not need yet.
Starter kit setup is often where new learners need extra guidance. A kit is only useful if it is organised properly, stored safely and used with the right workflow. That is why practical support, consumables planning and a simple practice plan matter. If you are working from a small workshop in Polokwane or a growing fabrication space in Pretoria, the right setup can save time and reduce avoidable wear on the equipment.
After your first day, you should leave with a clearer idea of what to practise next, what needs to stay clean, and what you must check before every session. If the training team gives you a refresher visit later, that can help fine tune your technique once you have had more time on the tool.
A Local Example from the East Rand Training Floor
Picture a learner from Boksburg starting the morning with very little hands-on experience. They arrive a bit early, go through the safety briefing, and learn how the laser class, eye protection and fume extraction all fit together. By mid-morning they are already making short practice runs on prepared steel pieces, with the instructor correcting stance and travel speed.
After lunch, the learner repeats the same simple joint several times. The first two runs are uneven, the third is better, and by the end of the day the bead is more consistent. That is a normal first day. The progress may not look dramatic in one session, but it gives a solid base for the next lesson.
If you are heading to training from Johannesburg, Durban, Cape Town or elsewhere in South Africa, expect the same kind of structure: safety first, then controlled practice, then clear next steps. That approach works well for beginners because it keeps the pressure down and the learning focused.